- To setup Reasons, click on ‘SETTINGS’.
- Click on ‘REASONS’, in the drop box.

- Click on ‘NEW REASON’ button.

- Enter the ‘REASON NAME’, in the field below.
- Tick the ‘ACTIVE’ box.

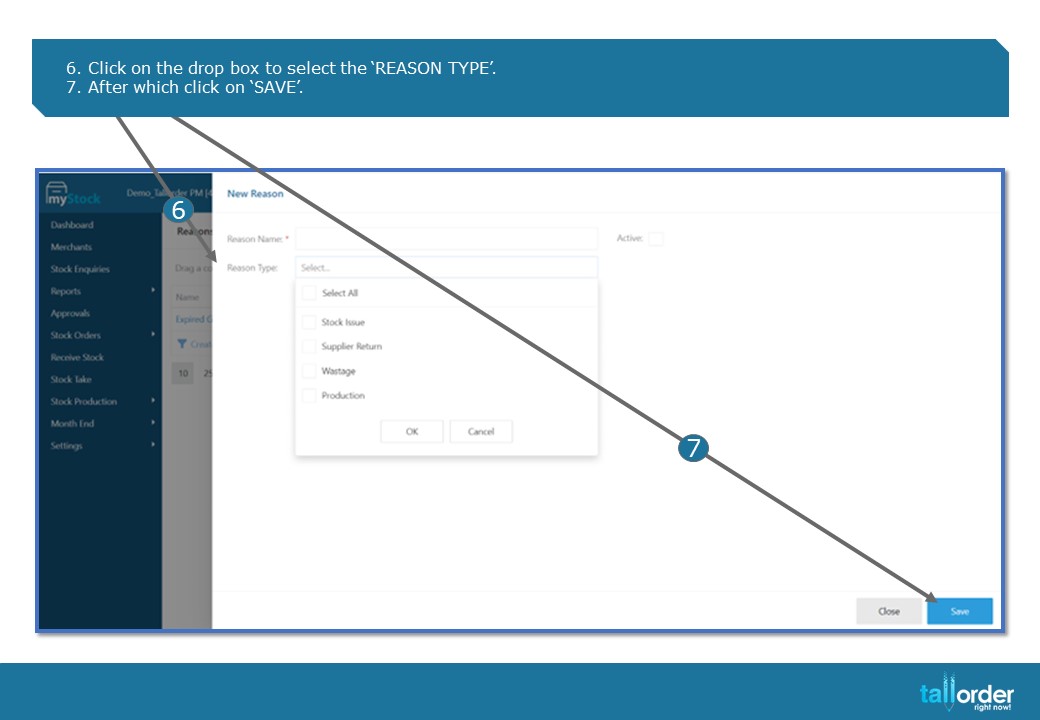
- Click on the drop box to select the ‘REASON TYPE’.
- After which click on ‘SAVE’.

- Finally click on ‘SAVE’ button to save the reason.

- The ‘SAVE SUCCESSFUL’ tab will appear to confirm that the reason has been saved.
- To search for reasons, use the ‘SEARCH BAR’.

- Reasons can be exported to Excel by clicking on ‘EXPORT ALL DATA TO EXCEL’.
- To export Reasons to CSV, click on ‘EXPORT ALL DATA TO CSV’.
STEP-BY-STEP BREAKDOWN
- To setup Reasons, click on ‘SETTINGS’.
- Click on ‘REASONS’, in the drop box.
- Click on ‘NEW REASON’ button.
- Enter the ‘REASON NAME’, in the field below.
- Tick the ‘ACTIVE’ box.
- Click on the drop box to select the ‘REASON TYPE’.
- After which click on ‘SAVE’.
- Finally click on ‘SAVE’ button to save the reason.
- The ‘SAVE SUCCESSFUL’ tab will appear to confirm that the reason has been saved.
- To search for reasons, use the ‘SEARCH BAR’.
- Reasons can be exported to Excel by clicking on ‘EXPORT ALL DATA TO EXCEL’.
- To export Reasons to CSV, click on ‘EXPORT ALL DATA TO CSV’.